Tuesday, March 1, 2011

Lazy woman's bread part 4: Batard

So far we have eaten 4 pizzas, two loaves of bouhl and the last thing out of that batch we had were Batard.  These are great for individual loaves for sandwiches or whatever.

The nice thing about artisan bread is that once you get these few steps down almost all of the variations start out the same.  Preheat your oven to 450 degrees.  And similar to the other breads we have done you sprinkle the top of your dough with flour and take off a hunk of dough.  This time about the size a a large peach.  Roll it down and under with your hands forming it into a ball.   I formed 6 of these for our dinner of Italian beef. 

Then you can practice your playdough snake making skills.   Really, just roll them in your hands that same way . Sprinkle your stone with corn meal and let them rise for 20 minutes.


 Just before baking sprinkle the top of your mini loaves with flour and take a sharp knife and cut about 1/4 of the way through each loaf.

 I do about 3 slits each and this is what they look like pre-baking.

 After approximately 20 minutes they will look something like this.


And when you serve up these mini loaves with this or just about anything you will get rave reviews.  I promise.


Cake truffles

These are also featured over at Sweet as Sugar Cookies in her sweet treat linky party.

These little dessert treats will make you look like the gourmet cook in all of us.  When in reality they are as easy as can be and you won't believe how delicious they are!

It may not seem this way but I really am not a baker and rarely do but with most everything I do I cannot just make a cake and slap on icing.  Why?  Will it taste the same?  Yes.  But I cannot settle for just one aspect of the process.  I not only love funtionality but beauty in the practical is what I love.  So it is actually hard for me to bake cupcakes and slap on icing for childrens treats because I just don't see the beauty in it but when I stumbled upon these beauties in a bakery I just had to find out what they were.  Because the look of them caught my eye enough to get me to purchase one for $3.99 but when I ate it...oh mmm.  My curiousity wouldn't rest until  I found out what it was I was eating.  They were called cake truffles.  What I found was they are incredibly simple.  So here it is in a nut shell. 

Today I made "Turtle Cake Truffles" to celebrate my husbands 32nd birthday.  But last week they were "Chocolate Covered Cherry Truffles" for my daughters 6th birthday.  The combinations are endless. 
What you will need:  Cake mix of your choice, container of icing your choice, chocolate for melting and any other extras you want to add.  Here I also used carmels and pecans.

Step 1: Make the boxed cake mix as directed,

OR enlist any helpers from the 4 ft and under crowd to do it for you.


The you have a perfectly good cake.  Slap on some icing and done!  Ha, nope I said simple but it is not that easy.  You take that perfectly good cake and....

demolish it!  Cut it into peices while it is still warm.  Not need to worry about keeping it pretty.

Then take a container of frosting.  I used caramel.  (It did not auto rotate so it is sideways icing)

Dump the cake and the icing into a large bowl.  I know it may seem weird but stick with me here.

Mix it all together until it is all well incorperated.  No need to over mix.

I said it was simple but I didn't say you wouldn't get really messy!  Now you need to form balls.  I do 1 1/2-2 inch balls.  They will be kind of rough at first but if you let them set for a couple minutes and clean your hands you can reroll them and they will be more shapely.

Let them cool.  I would suggest putting them in the freezer for about 20 min before dipping in chocolate.
During this phase you could also get a little fun and add suprises in the middle.  EX: chocolate covered cherry, chocolate cake, cherry icing and put a marcino cherry in the center of the ball.  Or Turtle, you can put a whole pecan or caramel in the center.

Some people use dutch ovens, I improvise.  This is my set up to melt the chocolate.


Drop in the balls...

Cover them thoroughly and quickly.


The last couple steps I failed to get photos of because my hands were full.  I just used the same method to melt the carmel as I did the chocolate.  Drizzled the balls with the caramel and quickly sprinkle with toasted pecans.   And here is your finished product!


And they taste amazing!  Like a super moist, dense, rich cake, covered in chocolate.  What is not to love?!

Happy Birthday Love!

Thursday, February 17, 2011

Have you ever ridden Steady bareback?

A friend asked me today on facebook and my response I thought you guys might enjoy.

ouch! yes, I try not to but sometimes I will. Mostly just walking though. But one time at a horse show I entered myself unknowingly in a ride-a-buck class. My friend told me it would be fun. She said that we had to put a dollar under our leg and whoever kept it there the longest got all the money. She failed to mention it was BAREBACK! So they called out walk, trot and canter and the goal was to keep the dollar between you and the horse. My personal goal was to keep my butt from hitting the ground!! Though I never actually got him to pick up a canter he flew around the ring in his fastest trot instead which is way worse than if he would just canter. We actually did pretty well and I was impressed. I think we were third to last left in the arena. I guess when your goal is just to not fall off and you basiscally made it to third place then you are doing good.  My motto should be set your sights low and you won't be disappointed. That would be a terrible title of a self help book but has worked well for me and Steady.


But riding Steady bareback is the worst version of a wedgie one can imagine. It is a spine wedgie repeatedly administered with incredible force. To say the least it is not fun and you are sore for days. Though I can only imagine the way that Steady would describe the experience. Probably something like. "Hey Moonlight you know that lady that gives us food? Well seriously has she ever considered weight watchers! I mean why would someone insist on climbing on my back with absolutely no padding the force me to run around in circles while they repeatedly slam their fat ass directly onto my spine??! These people are idiots!"

Saturday, February 12, 2011

Lazy woman's bread part 3: Bouhl

Bouhl is a fancy term for what I call a round loaf.  Which is completely versitile.  I have used it for soup bowls, for sandwiches, it is fabulous when you make the knorr vegetable dip and use it as a bread bowl.  A huge crowd pleaser.  This day I used it for garlic bread with our spaghetti dinner.  We had homemade spaghetti sauce all ingredients right out of our summer garden perserved for a fridged winter night like this to have a taste of summer.  Also meat balls made from our homegrown turkeys that we ground ourselves.  I also served green beans steamed from the freezer which also came from our garden.  The only thing that was store bought unfortunately was the pasta.  My mother insisted on confiscating my kitchen aid attachment pasta maker last time she was here.  Ok ok I guess it did belong to her but still  :).  And it is a bit pricey for me to justify purchasing.  And I am domestic and all but you won't find me hand rolling pasta when I can get it in a box for a buck.

So you take your dough from the fridge.  Preheat your oven to 450.  Sprinkle your stone, or if you have a pizza peal then put your stone in the oven while it preheats and do everything else on your pizza peal, but since I don't have a pizza peal I just do everything directly on the stone.  Sprinkle the stone with corn meal. 


Grab a hunk about the size of a grapefruit.

Use your hands to form it into a ball.  Rolling it under, turning a quarter turn each time.  It should be smooth on the top.  This whole process should take all of about 30 seconds.


 Let the dough rest for about 30 minutes...about the time it takes for the oven to preheat.

 When your oven is preheated sprinkle with flour.

Take a knife and cut slits into the dough.  You can make what ever pattern you choose.


Sometimes this dough can be funny depending on how long it sits.  What I have found though is that it all tastes the same may just not be as pretty.  But 90% of the time they do turn out very pretty.

Cut into slices covered in butter garlic and herbs put under the broiler for couple minutes you won't even care what the loaf looks like...mmmmm.

there you have it now we have made 4 foccia breads(we had pizza another night) and two loaves of bread.  The garlic bread was made from one loaf my family devoured the other the next day.  This bread does not store long.  Which is fine since it doesn't usually last long :)  It does store well for 1-2 days but not air tight.  I usually use paper bags.

Tuesday, February 8, 2011

Cows, you can thank me later.

I haven't eaten ground beef in probably 5 months.  Since we butchered our turkeys I cook everything I would normally use ground beef for.  Meatballs, chili, burgers, tacos you name it all with turkey.  I hadn't realized until tonight when I made tacos using ground beef that I really have not missed it at all.  Turkey tastes sooooo much better.  One nice thing about turkey is it really takes on the flavor of what ever is in it.

It won't be long now and we will have some more gobblers  hanging around the farm.  Raising turkeys has been such a great experience for us.  And this year having ground up 30 lbs has been wonderful to have.  So I cannot see myself buying any ground beef in the near future, so cows you can thank me later.

Wednesday, January 26, 2011

Dreaming of green.

I was scrolling through some photos and these caught my eye.  I was quickly drawn in by the thoughts of warmer days, fresh produce and dirty fingernails.  Go away with me, if you will to greener days.


                                                   Days where lettuce is abundant.

and there are herbs galour.

Garlic is ready to be harvested.


Green beans and peppers are prolific.


mmmm basil...

The days when the garden is green, the temperatures are warm and working outdoors is enjoyable.
 

In my attempts to avoid complaining about the temperatures that have consistently stayed blow average since the begining of December.  And not complaining about the winter blues that have set in and make fighting the weather even harder.  I am not complaining because I know this is how farm life goes.  There are ups and downs.  There is always work to be done and it doesn't slow down because it is cold.  So I keep at it and remember this too shall pass and not too long from now there will be greener days and dirty fingernails and more basil, tomatoes and swiss chard than I will know what to do with.  This life is a good one!

Monday, January 24, 2011

Lazy woman's bread part 2: focciaca

Wow I didn't mean to wait so long to continue this post.  I have been baking I just have not had time to post.  I love to blog but it is so time consuming.  I was hoping the winter months would make some more time to post but so far that has not been the case.  So if you made your dough I am sorry I have failed to show you the correct way to use it. 

So artisan bread, it is free formed loaves.  No loaf pans needed.  What you will need: A baking stone, extra flour, a rolling pin, olive oil and herbs of choice.  (you may be able to bake on something other than a stone but I have not personally tried it and from my baking experience there is nothing better than a stone to bake on.)

Focciaca bread is what we make for all of our pizzas.  We have homemade pizza at lease once a week.  Easy and cheap!  Even Jack's frozen pizza will cost you more and well, shouldn't even be placed in the same catagory as far as food.
Preheat your oven to 450 degrees.  Once you have your surface ready, I roll it directly on my stone using a silicone pot holder underneath to keep it from sliding.  Pull off a piece of dough about the size of a large orange.
Use your hands to roll dough over the top and under.  It forms a smooth surface on the top and almost into a ball.  Put onto floured surface and begin to roll it out.  I use the combination of a rolling pin and...
Practice your pizzaria skills buy using your hands and even tossing it into the air!  It can be fun!  Though I must warn you each time I toss it flour proceeds to spin off the dough into my face...lol.

I am not nearly as graceful at it as you see on tv.
You end up with something looking similar to this.  Remember this is artisan bread the whole idea is that it is imperfect shapes.  So striving for that perfect circle might be frustrating.

                    Then do with it as you please.  I sliced some garlic and put it into olive oil.


Then brushed it on the dough.


 A little oregano, basil and parsly sprinkled on.
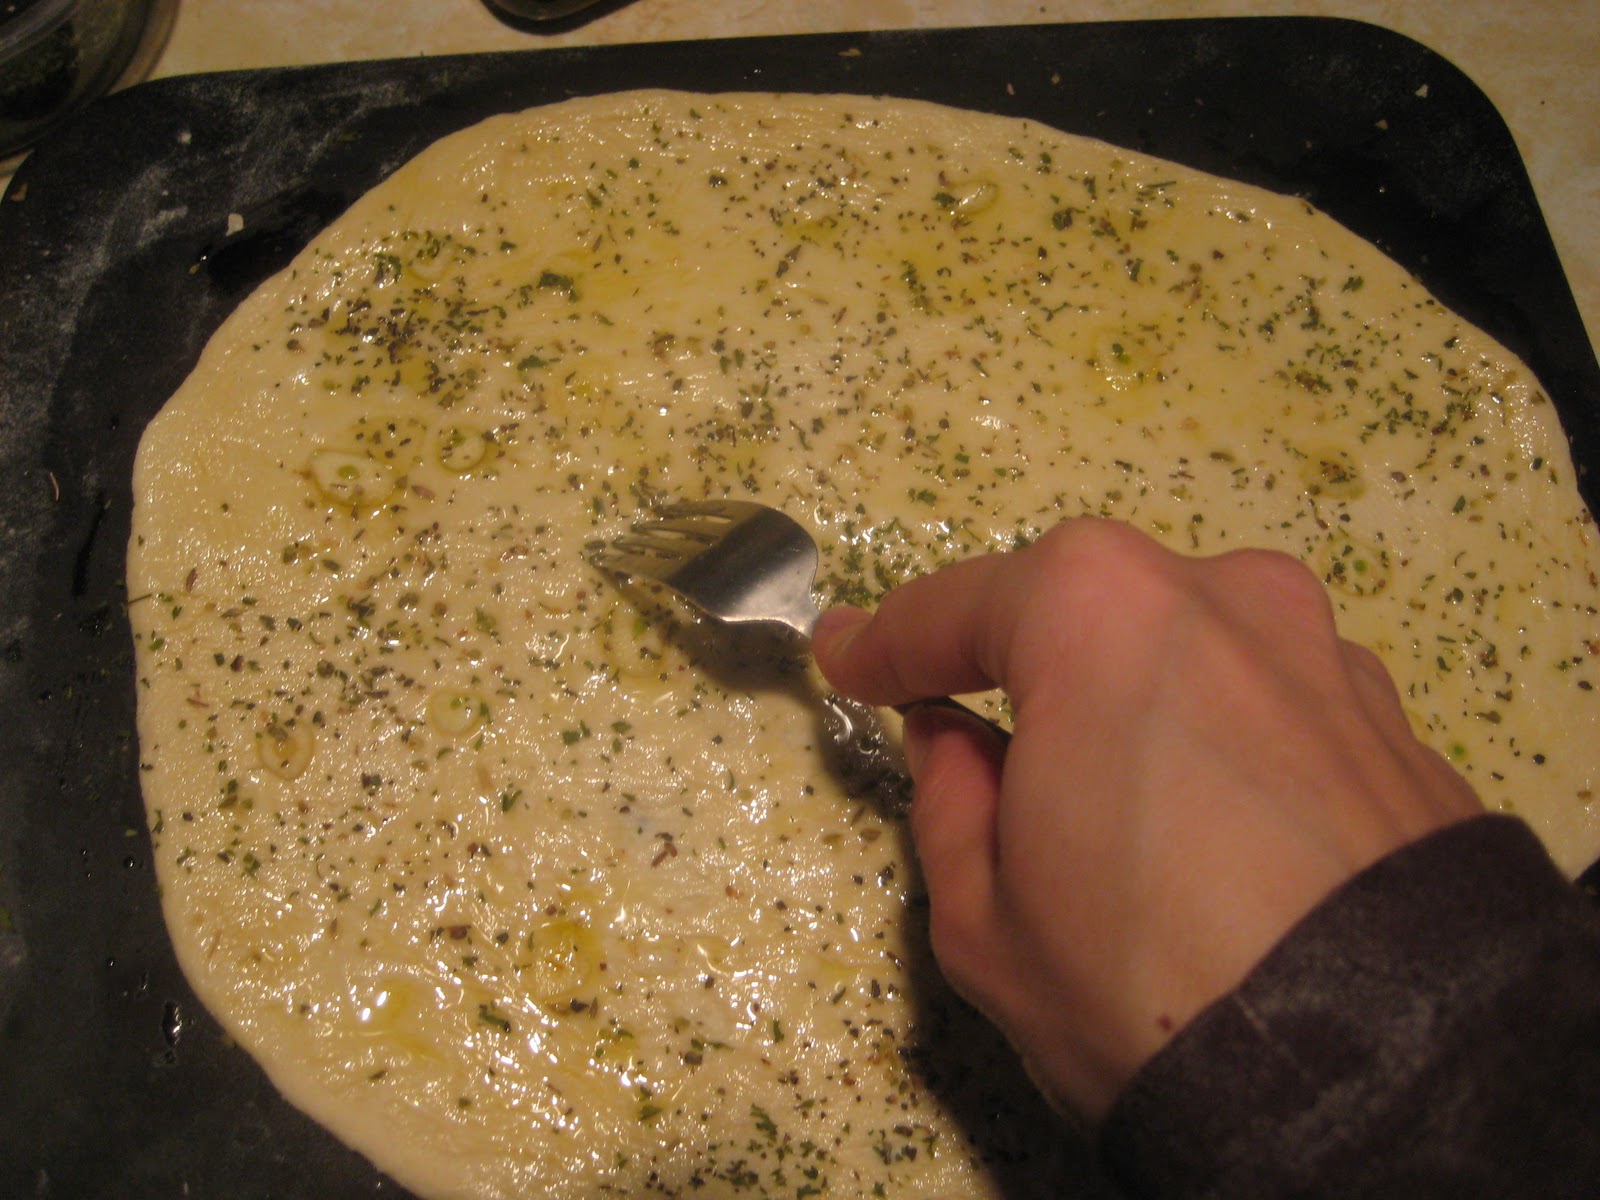
Poke it with a fork to avoid bubbling and bake for about 15 minutes at 450 degrees.  And it will look something like this...
Then do with it what you will.  The options are endless and can be what ever is in your fridge/freezer.  BBQ Chicken or Buffalo chicken are quite yummy along with the more traditional.  On this one we fried up some italian sausage, sliced tomatoes, garlic stuffed olives and my homemade spaghetti sauce.
                                   
Put it all together and....

Pop it back into the oven for 7 minutes or so and....
Viola!!!  Gourmet homemade pizza!!!

For our family of 5 good eaters we make two and that is plenty.  So far from our dough 2 pizza crusts/focciaca breads.